Some of the most frequently asked questions from both artists and collectors are, “What is your process, how do you decide what to paint, and how do you think through to the finish of an oil painting?” Sometimes this is difficult to describe but I find if I plan with great detail then paint the painting in my mind’s eye, it is usually successful. Here I have documented the process along with how and why some changes are made in mid-air.
Step #1: Identify the subject of the oil painting
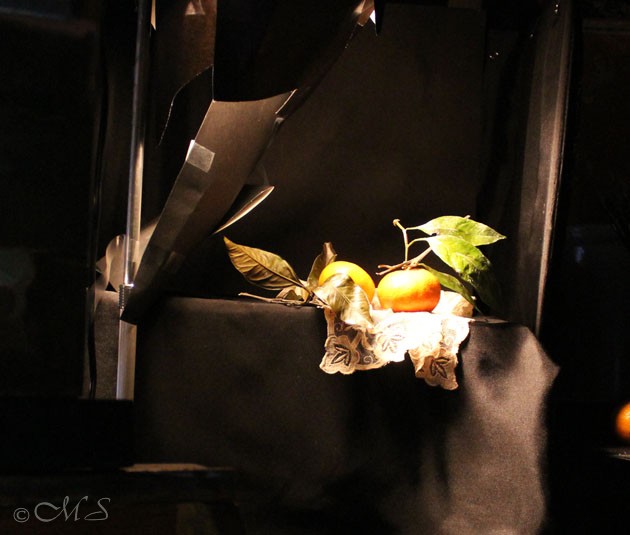
My concept was to do something intimate and small using a favorite piece of lace, some satsumas with leaves attached, and a very limited palette. There is a splendid Dutch frame in my inventory that I will use on the final piece. To proceed, I chose the smaller of the two shadow boxes on a stand to the right of my easel to set up the composition. Many different placements were considered until one was decided upon. The light flowed nicely from left to right as a crescendo of brightness fell onto the focus area of the lace and the fruit on the right.
Step #2: Decide on the color palette
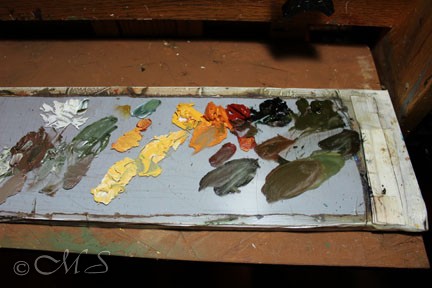
Sticking judiciously to my limited palette plan, just four colors and black and white were chosen. These were: Lead-tin yellow, golden ochre, red ochre, olive umber, plus black and white. There was no blue on my list however black plus white exudes a very bluish tint which makes for a muted red, yellow, blue color palette. An amazing range of colors can be achieved with only a few tubes of paint since they can be used to create a very subtle color theme.
Step #3: Determine where to place the subject
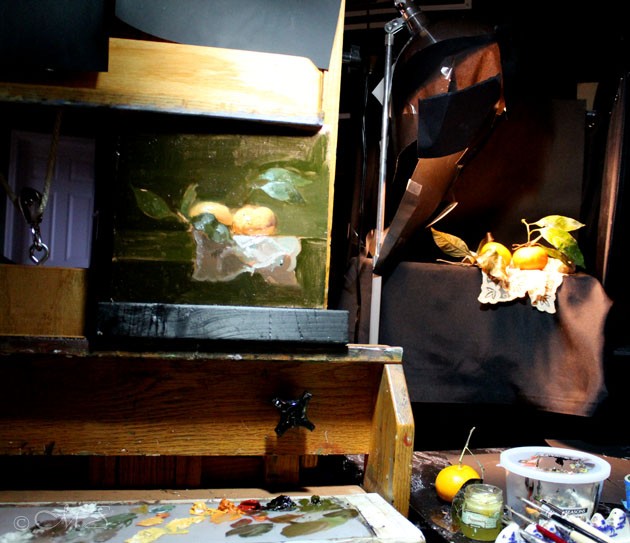
Here you can see the oil painting in its initial stages. Because I am right-handed, the best position for the setup is to the right of my easel. The light direction and brightness was controlled using cardboard or heavy black paper which I taped to the lamp. My studio has no north light exposure, so artificial light is the next best with the use of Ott bulbs as they are a neutral tone, neither warm nor cool.
Work with “mistakes” in your oil painting
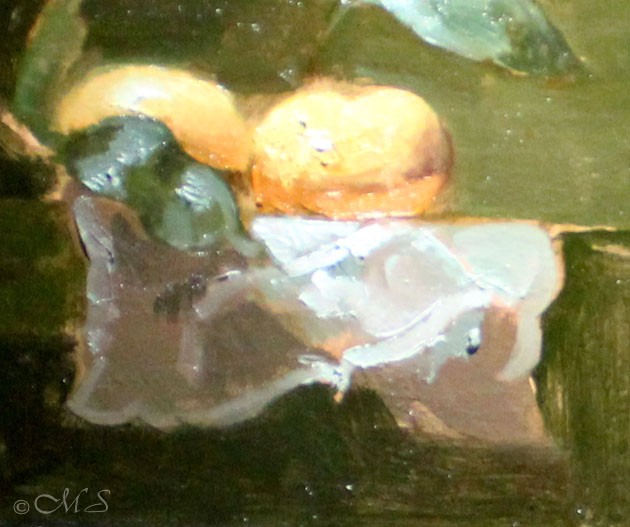
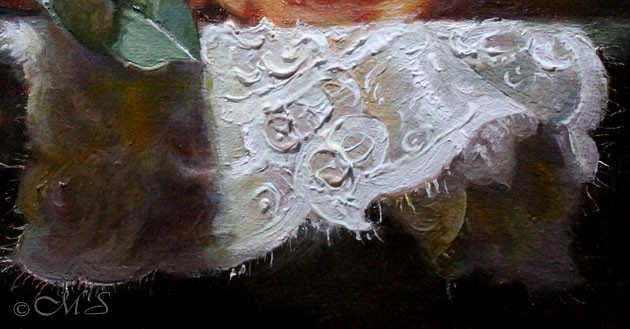
Often scraping down a passage is the only way to salvage it. I wrote extensively of the scraping technique in a previous post, Scrape, Don’t Scrap. This is true of the lace doily area here. The oil paint must be just the right consistency and the colors and values have to be correct. When painting a white object, many values of white are employed from dark to almost white, but each value has to be colorful, not just a range of values in gray tone. Don’t be afraid to scrape away and start anew.
The Finished Piece
You will notice in the finished piece that heavy impasto paint was applied to the pattern of the doily. This oil painting technique creates a highly textured surface filled with visual interest though only in the focus area. In the cast shadow shape under the leaf on the left and under the fold on the lower right, the detail remains vague and indistinct. There is only a suggestion of the pattern here and there, leaving the viewer to finish the passage in their imagination.
After careful consideration, I felt the satsumas were too perfectly smooth and roundish with no real character. Lumps, bumps, and flaws on the surface are much more interesting. So at this point, I remembered two over-ripe persimmons on my counter and decided they would work better. The satsumas were scraped away and replaced with the persimmons. In the end, the persimmons are more colorful and exude much more surface interest. What is your verdict on the persimmon/satsuma change-out?
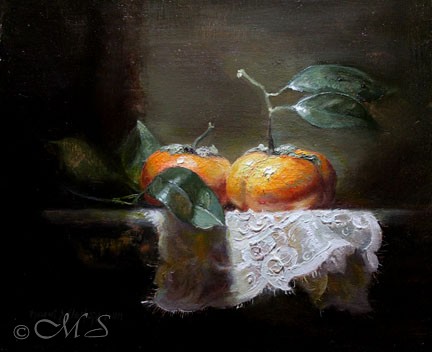
8×9 Oil on Linen Copyright Margret E. Short 2015

As I have said again and again, no one paints lace like Margret Short. It is a true art and she brings it to life. Breathe in all the info she gives you on painting, lighting and palettes of colors and you will never look at a painting again in the same way. She is an educator, and world class artist. You are learning from one of the best. I read every blog and I feel empowered to paint. Then reality sets in and I go back to cooking, that is something I am good at, and just wish I had a smidgin of her talent to paint.
Thank you always for your lovely comments. It is people like you who keep people like me at our easels.